Your home is exposed to the elements 24/7 and as such, you can expect it to sustain some form of damage every now and then. This is a more likely scenario when a particularly strong storm passes through your area. When this happens, it’s understandable if you want to get the damaged areas of your home repaired or replaced as soon as possible. Unfortunately, not everyone has the means to have their homes repaired immediately if it sustains damage. Thankfully, this is where insurance claims come in as they can help you fund your repair or replacement project. But how exactly does one navigate a post-storm insurance claims process?
In this article, Elevated Roofing LLC, one of the country’s leading residential roofing companies, lists the seven steps you need to follow when navigating a post-storm insurance claims process.
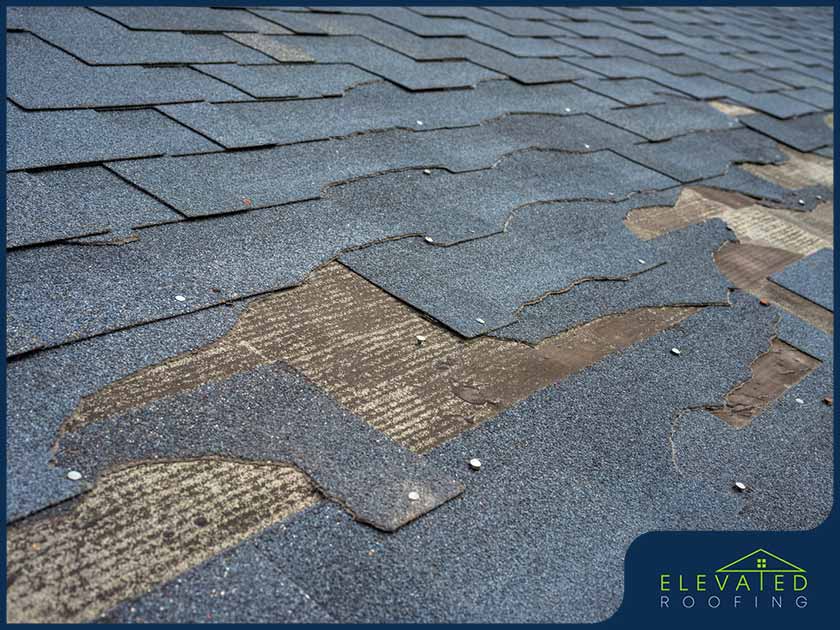
- Document the Damage – Before you file an insurance claim to help you repair your home, the first step that contractors always recommend that you do is take photos and videos of your home before the storm even arrives in your area. Once the storm has passed, you can repeat the process. By doing so, you’ll have before and after photos that you can give to your adjuster to further justify the amount you’re asking for in your insurance claim.
- Property Damage Inspection – Once you’ve documented the damage that your home has sustained, you can now have a professional contractor inspect your property. This is because before you can even make your claim, experts strongly recommend that you first have your home inspected by a professional. By doing so, not only will you be able to determine the extent of the damage your home sustained but you can receive an estimate for your repair or replacement project that can help you justify your insurance claim. To make your search for a professional contractor who can inspect your property easier, don’t hesitate to turn to Elevated Roofing LLC for assistance.
- Mitigate the Damage – The third step that can help make navigating a post-storm insurance claims process easier is mitigating the damages that your home sustained. While it may sound like a bad move, all you really have to do is ask your contractor to apply a few temporary fixes that can prevent your home from sustaining further damage while you negotiate with your insurance company on a settlement. Often, they will even reimburse the costs of these temporary fixes as long as the loss is covered by your insurance policy. This is an important step that you should always follow as failure to mitigate the damage that your home sustained can give them a suitable reason to reduce your settlement or deny your claim entirely.
- File a Claim With Your Insurance Company – After you’ve had your property inspected by an expert contractor, you may now file a claim with your insurance company. When making your claim, consider asking them to get in touch with your contractor so that they themselves can inform your insurance provider about their findings in your property. This not only puts you at an advantage in the claims process but it also saves you time and effort since you won’t have to constantly be on the phone with your insurance provider.
- Adjuster Meeting – After you’ve filed your claim with your insurance company and your contractor has informed them about the extent of your property’s damage, home improvement and residential roof repair pros say that you’ll still have to meet with your insurance adjuster. This is because to prevent any future misunderstandings, they’ll first have to explain a few things to you before they initiate the process for your claim’s financial settlement.
- Material and Color Selection Meeting – After you’ve met with your adjuster, you can now focus on actually repairing your home. Once you’ve settled on a suitable amount for your claim and you and your contractor have received approval from your insurance provider, you can now choose the materials that will be used to rebuild or replace the damaged parts of your home. During this process, it’s best that you choose materials that are high in quality since your insurance company will be helping you pay for them. To get the best materials for your home renovation project, be sure to enlist the aid of a home improvement professional for their help and advice.
- Rebuilding and Repairing – Once you’ve chosen your materials for your renovation plans, your contractor will deliver them to your property alongside a trained and certified crew of construction professionals. When they arrive, they’ll immediately start the repairs to restore your home to its previous condition. That way, your home’s value and aesthetic appeal can be preserved and improved.
- Inspection – Finally, once the production process has been completed and all necessary repairs have been finalized, you can now ask your contractors to inspect the repairs and replacements they’ve made. During this step, be sure to scrutinize their work as much as you can so you can ensure that they were completed to the highest possible standard. If there’s anything that seems to be out of place, inform them as soon as possible so they can fix it before you give them the final payment for the project.
Additional Tips When Navigating a Post-Storm Insurance Claims Process
When you’re navigating a post-storm insurance claims process, there are a few tips that you should keep in mind. For instance, always be alert for fraud as home repair frauds are common after a natural disaster. When you’re on the lookout against home repair fraud, be wary of contractors who are too aggressive or demand up-front payment as they are likely looking for a way to make a quick buck by trying to take advantage of victims. As much as possible, try to avoid feeling pressured by contractors and don’t rush to sign a contract with them if they’re too aggressive in their tactics. To prevent becoming victimized by home repair frauds, be sure to only enlist the services of local or trusted companies when renovating your home.
Apart from trying to watch out for home repair frauds, another tip that you should keep in mind when navigating a post-storm insurance claim is that you should also understand your roof’s paperwork. Remember; your roof is one of the trickiest areas of your home when it comes to insurance claims and as such, it’s best that you understand everything that you can about it to prevent misunderstandings. With that in mind, be sure to carefully read through your roof’s warranty and paperwork before the storm even arrives in your area so you’ll know what are the exclusions and conditions that can accidentally void its warranty. By understanding everything you can about your roof’s paperwork, you can prevent loopholes that can reduce your insurance claims settlement.
Looking for someone who can help you maintain your roof? Look no further than Elevated Roofing LLC. When it comes to residential and commercial roofing repair services, we are the leading experts to approach and we won’t let you down! Give us a call at (205) 684-39456 or fill out our contact form to request a FREE roof inspection today!